Exciting Announcement!!!

Meet Indah Island’s new smart home tech partner

Indah Island is very pleased to announce it has entered a Spokesperson and Media Agreement with Perth-based smart home company, Quantify Technology.  www.quantifytechnology.com

Founded in 2015, Quantify have created easy to use, simple to install and adaptable products that transform traditionally wired houses into smart homes using a flexible wall switch connected to the WiFi.  

Their clever cloud-configured system allows all devices within a home to be controlled via touch, app or voice, with Amazon Alexa integration. Their solution has been designed to save time and energy, at a price point that enables wide-scale adoption. 

Their solution exists to enhance the lives of its users, while suiting the needs and desires of electricians, architects, designers, builders and beyond. 

We are currently collaborating with Quantify on our farm renovation which will be featured in 9Life’s home-renovation show Ready Set Reno in October. This new 12-month agreement will further extend our relationship with Quantify which we are looking forward to!

Quantify ticks all the boxes for our Ready Set Reno home renovation project. We chose to partner with Quantify because they provide an easy-to-install and easy-to-understand, customisable solution that looks exceptional. We’re thrilled to be able to promote their impressive living experience solution to the market.

Quantify’s CEO Brett Savill said we will play an important role for Quantify moving forward. 

“Having someone as notable as Natalee Bowen behind our brand will assist with opportunities as we look to build relationships in Australia and overseas,” he said.

“We are very pleased to have Natalee join us as a brand ambassador.”

Ready Set Reno farmhouse gets wired!

Indah Island Farm Project

At Indah Island we are always designing and creating beautiful homes for clients all over Australia, so when the opportunity comes to design and create our own homes there is always excitement in the air.

18 months ago, I was commissioned to go to the Hamptons to share the wonders of New York and The Hamptons district. We took 10 of the top builders from all around Australia, along with the editors from the magazines; House and Garden, Home Beautiful, In Style, Inside Out, Country Homes, and of course Grand Design. It was an opportunity to show case all the classic Hampton styled homes, including designs all the way back to the 1800’s. It was a magnificent adventure both for builders and the editors to capture why the Hamptons style is so popular and to experience and understand the longevity of the style.

I got to exhibit the lifestyle of the Hampton’s and showcase the different styles within the homes themselves. We had the opportunity to wine and dine within some of the most beautiful homes such as Tommy Hilfiger, Vince Camuto (the owner of Nine West), Marc Jacobs and of course Martha’s Vineyard. We were sanctioned to sail around Sag Harbor in a yacht, dine in East Hampton, stay in Montauk at Gurney’s famous resort and indulge in some of the fabulously famous spots that only the likes of celebrities get to go. However, it is not true the Hampton’s influence is only for the rich and fabulous as on this trip the questions gathered; how do we take from the Hampton’s style and create our own here in Australia? We know exactly how!

A few years back, we had the opportunity to purchase my husband’s 5th generation original homestead. His father was born there so there was always a huge amount of sentimentality with this property. We dreamed of restoring the home into its former glory so it was decided… We were to design and create a true Hampton’s style farmhouse, right here in Western Australia! We wanted to encapsulate the true look of the Hampton’s as it was back in the 1800’s, as the Hamptons really originated from the barn style farmhouses. It wasn’t until the late 1900- early 2000’s, that the rich and famous starting buying into the area as their beach playground. We started the project early February this year to create our very own WA Hamptons Farm House and hope to finish around September! That quick I hear you mummer… YES! It is all about scheduling and timing. Not to mention the Hampton’s is such a detailed style, so once we are at lock up that’s really when the fun begins.

We are using some fantastic products to create such a unique and quick build. We are framing this home with True Core steel, which has been incredibly fast to see go up. Here in WA, we are so use to building double brick and tile (as my builder-father would say, if it not brick it won’t last). Well we beg to differ, as True Core steel is the future of framing. We choose True Core steel for many reasons; It is strong, straight and precise- it won’t twist or warp over time giving the home its longevity, it is fire resistant- which was a huge factor building in the country and it is termite and borer proof- another factor to why it has the ability to go up so fast.


We are staying very true to our design atheistic using cladding and an array of other incredible products that we will keep you up to date with as we progress. Excitingly, we also have Dave Franklin, Channel 9Now ‘The Block’ landscaper, weaving his magic on our Hampton’s Farm, so stay tuned for all the behind the scenes information and we look forward to sharing this incredible build with you right here in Western Australia! You can also watch all our updates of the #indahislandfarmproject on Instagram at @indahisland.

Our Forever Home

When we had considered ‘The Top 4 Questions’ (Check out our To Build or Renovate Blog) for my family and I, we decided to buy a home in an area we loved, that we could renovate to become our dream Hamptons home. We searched and searched and found the suburb and block we wanted but the house was a disaster! It was a horrid mess of faux-orange mediterranean walls on the exterior with green internal walls and a sunken lounge, which can be a renovator’s nightmare.

All this and to finish the dreadful green floral drapery, we knew there and then, we were going to buy this home but it all had to go. It was the view that took our breath away. It was on the water and this was really all that mattered to us at the time. So, where to start, what to do, how could we turn this mediterranean mess in to a stunning Hamptons home? With all this in mind, the worst design crime of this home was the way in which it turned its back on the water and light, with solid walls on the marina side and exterior shutters making the living spaces dark and gloomy. We were keen to instantly bring home the enduring chic of the Hamptons style so embarked on our whirlwind renovation.

The first step was resolving the sunken lounge, removing a nib wall between the front door and living room, both in which improved the flow throughout the home. The mezzanine level was extended and squared off. The round columns (which needed to be kept for structural reasons) were replaced with squared-paneled newel posts. The external shutters were binned in favour of white internal shutters and new window architraves. Keeping true to the Hamptons style it was all clean lines, very classic and stylish, but also felt very homely and comfortable. We chose materials that suited the classic style like marble, oak and ceramic to fit with our white on white palette. To complete the colour palette, we added occasional blues to create a relaxing vibe and comfortable chairs paired with a solid timber table in our elegant eating area. As an Interior Designer I knew we had to choose the right style of chair, rug and cushion to change the rooms feel. To finish off our rooms we accessorized with an eclectic mix of pieces, many referencing the waterside location and embellishing the sitting room’s blues, white cupboards and coffee tables.

It was an exciting process and a fabulous experience as the Interior Designer became the client. I was my own client and probably the worst client I had! When you’re exposed to so much beauty and choice daily, to narrow down your choices, was a huge test of my restraint. Our ‘before and after’ transformation was amazing! With great design and clever aesthetic choices, you can really achieve the look you want to create no matter what you begun with.

To Build or Renovate?

How do you know you if renovating is the best choice? A question we get asked daily from clients is “What should I do to my home?” Should you stay and renovate, knock over and start again or find something new?

When renovating you must always take the challenge head on! You need to think out side the box to create your dream Hamptons home. The image you’ve created in your head has to be brought to life; you must always think literally and creatively. Remember, things don’t always go to plan when you renovate, it is like peeling back layers of an onion. There is always a flow on effect so you need to be on the ball at every moment, ready to re-create. When building, however, it is very easy to create your dream Hamptons home and you can plan every aspect and have sizes as you want, make it as livable as you want, rooms where you need them and the look is fresh rather than re-faced. Building new opens up a Pandora’s box of ideas.


When creating a new home, a few things to keep in mind are how you want to live, do you like open plan or do you prefer separate rooms? Are you an indoor or outdoor person? What rooms do you spend most of your time in? What is your style? It is a huge decision that takes much consideration. I have 4 questions I always ask our clients and each of these serve to provoke their thoughts and allows them to think about things objectively.

Top 4 Questions


  1. What don’t you like about your home? Start to think about what your dislikes and likes are of your current home. Maybe it’s the flow of the house or the way it looks that is making your feel uneasy. Sometimes it comes down to timing, is it time for you downsize or up-size?


  1. Do you love the area? You might have great friends in the neighborhood or a favourite park you take your pets and kids. You may love your neighbors and/or the area so much that the thought of leaving is just out of the question. You need to consider what lifestyle this area is giving you. I know when I chose our home it needed to be near the ocean!


  1. How much longer do you want to live there? Do you want this to be your forever home or maybe it is only in your 5-10 year plan? You can start weighing up if it is worth staying in your home or move on to greener pastures. Many clients renovate with the intent to flip, and then re-fall in love with their own home again with its new Hamptons feel.


  1. What is your budget? You need to research what could you add to your house that would be worth your money. This is a great time to go and see other homes in the area, check the market on similar homes and prices, then ask yourself, is it worth renovating and refreshing your home or should you build new? Your next step would be to see if there is land available and work out how much your dream home would be worth to build. Also, check to see if you have time on your side to build. A renovation may take 3- 9 months, where as a build could take 14-24 months, both dependent on the detail. The factors at play here are – do you need to move out for a period of time? What is the cost of renting property whilst you wait for your new home to be built? If you need extra support with this, jump onto our website ‘Blog’ for working within $10K, $20K and $30K budgets.

Once you have considered all of the above, you get to the fun part! Start looking at Instagram, Pinterest, cut out your favourite looks in magazines and start collating a mood board of images. Sometime you don’t even know what you like in the picture but it may just feel right. The feeling you get when you look at you mood board is what you are looking to achieve. When all the images are placed together you can start to see a style coming through and without even releasing, voile you have your style. No doubt if your reading this article, then your style is classic, coastal and all about the Hamptons.

Let’s go Inside- Hampton’s Styling

There are many different styles within the Hamptons’ style. So many in fact, most people often get confused when creating the style within their own homes. When visiting the Hamptons, the exterior of all the homes have the same build elements that create that recognizable ‘Hamptons’ look; Beautiful grey weatherboard, pops of white trim and divine details. However, when it comes to the interior of the home, this is where it can get a bit tricky and we love to bring our clients own style into play, so here’s some helpful tips so you can create your own Hamptons’ style too.

Coastal Hamptons Interiors
When creating a Coastal Hamptons’ style, firstly, some elements of the build are slightly different. To begin, squaring the posts within the home and make sure cabinetry is to the floor with less detailed moldings. Newel posts on your staircase should be cleaner with more structure and we use Coastal VJ for paneling on walls and features, and less focus on detailed cabinetry. You can still use a shaker style cupboard front but when it comes to island benches and wet areas it is more of a clean lined look and feel. Bench tops can also be cleaner, think an engineered stone that is white or grey. Choose a soft colour way, like a blue island bench as this is used to really bring out the blue of coastal locations. Look and think of the home we helped create with Deborah Hutton in Bronte Sydney.

When it comes to styling and furniture, we use a lot of natural textures of jute, linen and sofas with blue and white pops. We layer with greenery and add in accessories such as corals, shells and more beach style elements. Using lots of white on white offers freshness to the space as well. Sofas in this style are more slouchy and soft and seat placement is very important. Lighting also plays a part of the whole scheme and the use of cane pendants is a great way to effortlessly create that beachy feel.

Traditional Hamptons Interiors
To create a Traditional Hamptons’ style the kitchens are by far the most detailed. You can start with decorative moldings and wainscoting, and paneling should be used on most surfaces, with coffered ceilings and dado rails. Picture rails can also enhance this look. Cabinetry in wet areas should also take a lot more detail. Specifically, in the legs of the cabinets and also the bench tops which we use the traditional Carrara Marble. In styling and furniture, we introduce more blue and white, floral and oak tones with depth that grounds a more traditional style. This is where blue and white rugs come into play, with blue linen sofas and more traditional seating like the Louie and Spindle chairs as occasional seating and plenty of Roll Arm sofas for comfort. Chesterfields can also be used with this style, and to finish blue and white ginger jars and more eclectic style accessories. Lastly, lighting is more elegant with hanging chandelier pendants with plenty of detail and crystals throughout. Even in bathrooms and powder rooms, a few beautifully placed lights are a must.

Modern Hamptons Interiors
In the Modern Hamptons’ style, things become more pared back, cabinetry has flatter fronts, cleaner stone is used and sometimes waterfall ends are a common take. Little to no paneling is used, just crisp walls with little detail to create a more modern feel. With styling and furniture, we use more of a monochrome look and feel. You must create more structure with square style sofas and the chairs can have more of a modern twist. We use black and whites within this style and can also add a little tribal feel to add in more texture throughout. When choosing furniture look for clean lines and substance with consoles and buffets whilst keeping the palette more neutral. Lighting can be more structured with the use of modern glass pendants and less detail. Think, wood or concrete at the base of the lights with glass coverings, which screams modern twist.

Indah Island’s Hamptons’
The style we love creating at Indah Island is a little mix of all of the above, whilst being eclectic and bringing in a touch of the Bahamas and British colonial; That is the difference that stands us apart. We introduce our clients to these options and visually show them how to introduce white and black/ blue and whites, oak pops of furniture, layering with natural textures and collectively bringing the outdoors in. It is important to create a flow from front to back, making sure that there is visual appeal throughout and a story is being creating from the first glance. We are huge lighting fans, and see every opportunity to hang a pendent light to create a mood or just for sheer beauty. These can be collectively a bit of everything, from chandeliers to beaded pendants and wall scones, the more the better.

Helping clients creating their own style is what we do best, and we have been asked for years to bring our own Indah Island Hamptons’ style to life… We are very excited to announce we are launching our own Indah Island brand of furniture, fabric and accessories to help do just that; bring the Indah Island Hamptons’ style to life. We had so much fun at the Australian Trade Fair and have picked up so many fabulous goodies to share. To keep updated and informed of the Indah Island Online Store launch jump online and subscribe now so you don’t miss out!

Hampton’s Renovation on a Budget

The Hamptons is often referred to as the playground for the rich and famous, but beyond the high society that frequents this seaside community, it is an architectural wonderland that has inspired designers for generations. Right now, the Hamptons style is a predominant force in exterior and interior design in Australia. It’s on the hit list of every major retailer and builder with consumers referencing this look above any other.

We are often asked, “Is it as expensive as it looks?” Well, we have worked within many different budgets and deciding on a realistic budget is an essential part of planning any renovation, if not the most important part! When to comes to how and where to spend, we have put together suggestions so you can get the look you want, without completely emptying your bank accounts.

On a $10K budget

Firstly, freshen up internal and external walls with a new colour – look to a coastal-inspired palette of creams, whites, greys and blues. Use trim on the windows and doors for a crisp, modern look and add paneling to the walls throughout for a pristine finish. You can pick and choose particular areas to add paneling if the budget doesn’t allow your full home. Focus on the layout of your home; you can reposition furniture to create an inviting space for free. Lastly, invest in key furniture pieces, bringing in soft furnishings such as cushions or a lampshade to pull the Hamptons look together. Choose neutral tones in natural materials such as cotton and linen.

On a $20K budget

Splurge a bit on your exterior and get the classic weatherboard look and add crisp, white trims. Then, you can freshen up the colour both inside and out, keeping to white-on-white or a soft, coastal-inspired palette of white, blue, grey and cream. This budget allows you to revamp your kitchen with shaker-style cabinetry and a white subway tile splashback. In your most common living areas, soften up the space with furnishings – floor rugs, throws and cushions in neutral tones and natural materials such as jute and linen will complement your home’s seaside colour palette. Lastly, bring greenery inside to for a seamless indoor/outdoor feel – a few oversized pot plants and palms will create the perfect holiday-at-home look and add vibrant colour to a neutral palette


On a $30K budget

Create a classic weatherboard exterior and add trims for a crisp, elegant finish. You now can add columns and a balcony at the entrance of your home for a real ‘wow’ factor and an unmistakably Hamptons-inspired façade. Within this budget you can now focus on the kitchen and wet areas, using cladding on the walls and incorporating shaker-style cabinetry and a white subway tile splashback. Add statement pedant lights and bar stools for decorative touches. The best part of this budget is you can update the flooring and internal paint colours with similar hues to create a seamless flow from indoor to outdoor living. Lastly, revamp your furnishings with a few larger pieces, such as wicker armchairs and a jute rug. These can be complemented with soft textiles such as throws and cushions in neutral shades, as well as lush indoor greenery such as large, potted palms.


Renovating my own home

When we renovated our own home, we had to be aware of our budget and have realistic expectations. We had brought a 20-year-old run down home, the worst house but on the best street, in a fabulous location. There was a lot of planning and budgeting discussed and this is why we completed two renovations, a few years apart.

The first renovation, we did before we moved in. We guttered and moved walls, re-did flooring and cabinetry, painted internal and external, and added bi-fold doors to take advantage of the marina view. This was all completed in 8 weeks! Our second renovation, which was televised on Channel 9, saw the next transformation of external works. We added a pool, an alfresco, beautiful detailed balustrade works and re-decked the leveled area.

All About the Details

A great way to showcase a home’s character is by creating layers when building or renovating. By using the foundation of the home, you can create this character and layering on the walls. When looking at a Hampton’s style home or a take of, paneling is a major detail that is reflected throughout the home. Within paneling you can choose many different styles; Traditional Wainscoting, Shiplap, Dado Rails, Picture Rails, and Full Wall paneling.
 

Traditional Wainscoting

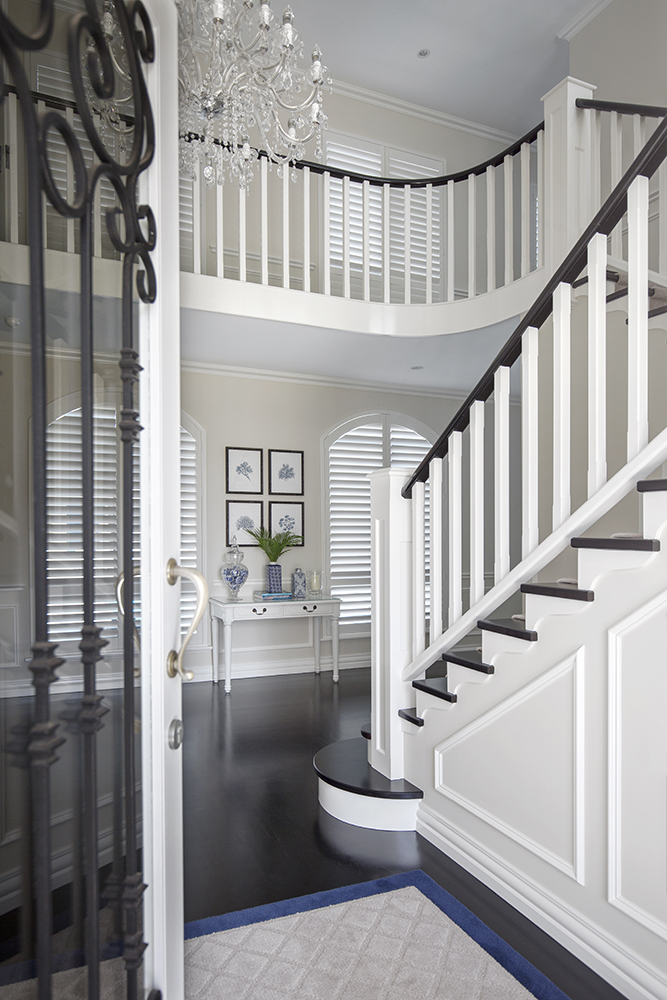
Wainscoting replicates a traditional look, using different mouldings and trims that would conventionally go to a Dado height of 1.2 metres from the floor. This look is formed by layers of squares or rectangles to emphasis depth on the walls. These mouldings are typically highlighted in white, to create a band of detail throughout the house. Contact your local carpenter or trade in this area as it can be worked in with your skirting. The biggest use of Traditional Wainscoting is preferably in an entrance, up the stairs, when creating a more formal room or in bathrooms and bedrooms to add another layer of detail and character. It can be made out of wood trim mouldings, plasterboard or cut out wooden panels depending on your budget. If you’re on a tight budget, you must consider where this look is going to make the biggest impact, and research around for different products to create the look as this is a big factor in your budget.


Shiplap

Shiplap is the use of vertical or horizontal boards on a full wall. This layer is used to emphasis detail in a room, area and wall. The best part is you can use it throughout your home, only in certain areas or just to create a feature wall in one room. It can also be used in wet areas; we suggest using the Scyon Wall products through James Hardie, as these are a waterproof product that can line a wall in a wet area to create that Shiplap affect. We love suggesting Shiplapping as it is very cost effective, and a great way to detail a bedroom wall, as you can add a popping colour as a feature or even replace a bed head. It is easy to install and can be a good DIY project over a weekend.
Dado rails

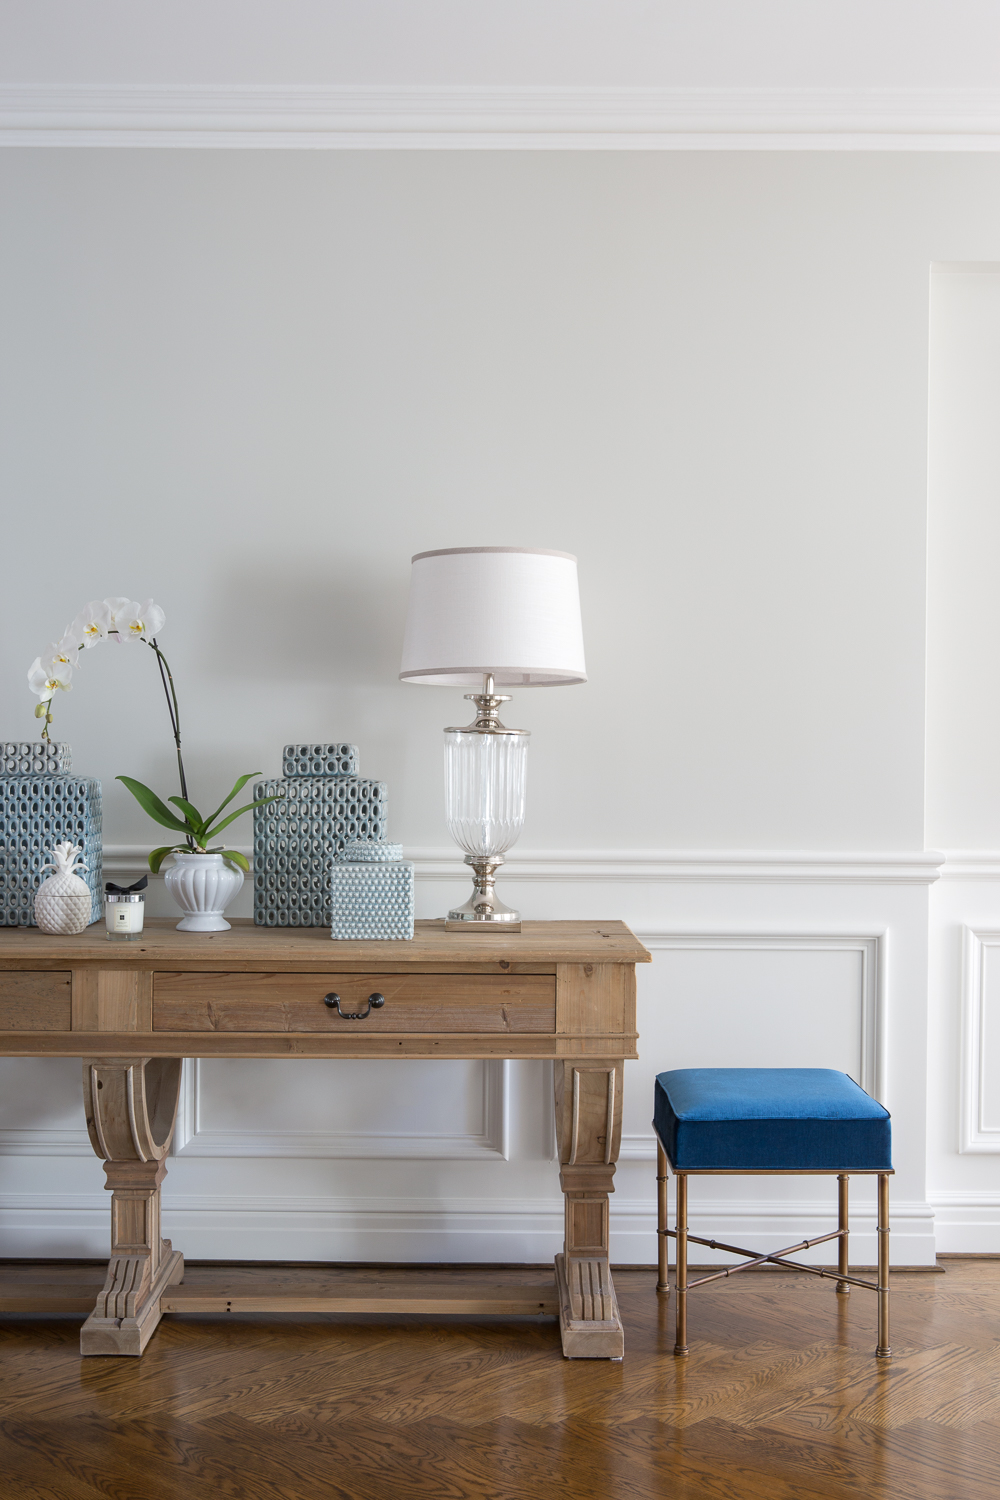
Dado Rails are another great use of mouldings and trim to emphasis a space. They are a stand out feature that can be used on all height walls not just restricted to tall walls as they are normally at a 1.2 metre height. Dado Rails can be painted in white to stand out or painted the same colour as the wall to add depth. We suggest using this look in entrances, up the staircase and in formal rooms, if it doesn’t fit your budget to fit out the whole home.


Picture Rails

Picture Rails are traditionally known to hold a painting or picture, with a hook and wire, therefore no need to drill holes in walls. They are now used in a more contemporary sense to draw the eyes to a higher level in a room to create height, depth and character. These details are traditionally used in a higher wall, but we are now seeing them in homes even at a 2.6 metre high roof. It is a great way to manipulate where you hang your artwork and be able to rotate your styles without making holes in the walls; making it easy every time you restyle your home, or change the look of a room.


Full Panel walls

This is a look that has come back in trend; using straight lines of wood paneling in the shape of rectangles, floor to roof. This look increases depth in a room, and can be used as a feature instead of art and/ or wallpaper. It is a more modern take on a traditional look. When creating this layer, it is a great idea to pencil it out on the wall. That way your professional trade can see exactly where you want them to go, the heights you want them at, and to see if your wall is more suited to rectangles or squares. This way no mistake will be made and there are no surprises.

In all of these styles, the profiling of the moudling doesn’t necessarily have to be overly detailed; it can be a simple rectangle to create a more modern look or to the extreme of highly profiled scroll, for a more high-end traditional look and everything in between. It is great idea to look at moulding online, find inspirational images or speak to your carpenter or builder to show you the profiles. Make sure to place them on the wall of your home to see what works best in your space and what will create the look you want to achieve. My go to is Intrim Mouldings. They have a huge range of profiles that will create anything from modern, classic, traditional or more.
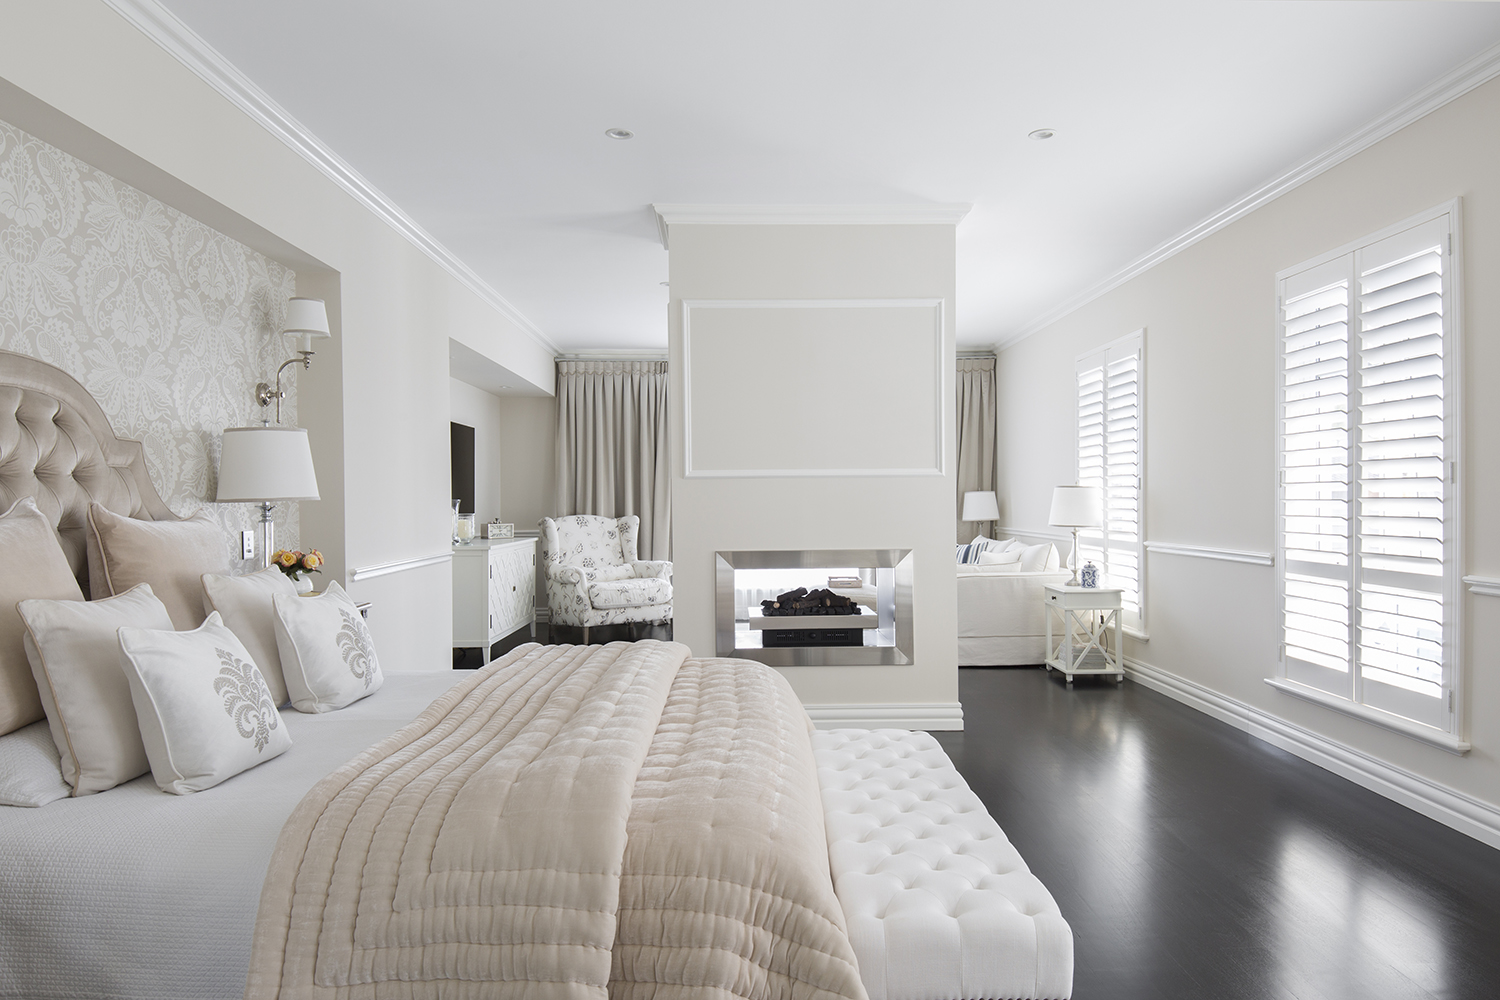
We are currently choosing our mouldings for our #indahislandfarmproject in Toodyay. Make sure you jump onto out social media @indahisland to follow our progress.