Indah Island & Co
Shop Now
×
0
$
0.00
0 items
No products in the cart.
Home
About
Shop The Look
Indah Island Wellness
What's New
Masterclass
Service
Building & Renovation Service
Interior Design Service
Indah Island Services
Shop
Rugs
Living Room
Dining
Bedroom
Office
Lighting
Armchairs
Buffets & Consoles
Coffee Tables & Side Tables
Drums & Stools
Cushions
Ottomans & Benches
Rattan
Sofas
Mirrors
Wall Art
Shop All
Portfolio
Indah Island TV
Gallery
Media Coverage
Weddings/ Events/ Stays
Brand Collaborations
Balsam Hill
James Hardie
Blue Scope Steel
Corinthian Doors
Jason Windows
Penfolds
SamBags
Hutch Table Accessories
Modular Walls
Luxaflex
Hart & Co
Intrim
Brodware
Santuary Makers
Elite Access Card
Showing all 4 results
Default sorting
Sort by popularity
Sort by average rating
Sort by latest
Sort by price: low to high
Sort by price: high to low
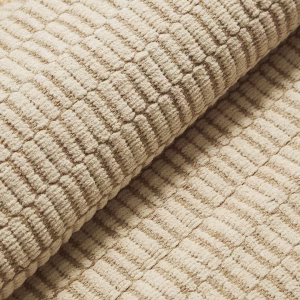
Claudia Rug
$
510.00
Add to Cart
Quick view
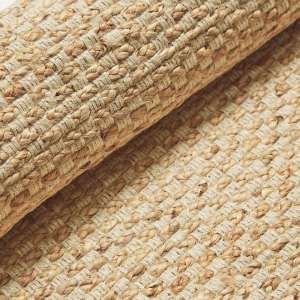
Freya Rug Small
$
540.00
Add to Cart
Quick view
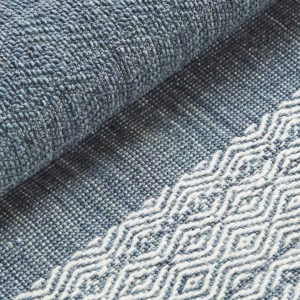
Madison Rug
$
1,500.00
Add to Cart
Quick view
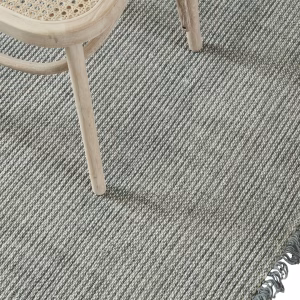
Jaylin Rug
$
1,580.00
Add to Cart
Quick view
Explore
Home
Service
Shop
Portfolio
Elite Access Card
Brand Collaborations
Visit our Facebook
Visit our Instagram
Visit our YouTube channel
Company
Indah Island
Hamptons Farm Estate
Indah Island & Co
Private Policy
Terms & Conditions
Contact
General Enquiries:
office@indahisland.com
Project Design & Build / Head Office:
office@indahisland.com
Press & International Enquiries:
pr@indahisland.com
Wholesale Enquiries & Trade:
sales@indahisland.com
Customer Care:
orders@indahisland.com
Join Our Mailing List
Email newsletter
>
If you are human, leave this field blank.
Follow
Visit our Facebook
Visit our Instagram
Visit our YouTube channel
© 2026 Designed | Developed by
Privacy Policy
Terms & Conditions
user
shopping-cart
Code Snippet ma-customfonts 3.4.2
View Cart
Checkout
Continue Shopping
linkedin
facebook
pinterest
youtube
rss
twitter
instagram
facebook-blank
rss-blank
linkedin-blank
pinterest
youtube
twitter
instagram
We use cookies to ensure that we give you the best experience on our website. If you continue to use this site we will assume that you are happy with it.
Privacy policy
Ok
Privacy policy